Skip to content
⏱ Estimated read time: 12–14 minutes
Let’s be direct: most beginner soap-making failures — soft bars, harsh cleansing, seized batter — trace back to one thing: getting the oil-to-lye ratio wrong. A cold process soap making guide for beginners only earns its name if it actually explains the ratios, not just the pouring steps.
This guide breaks down the chemistry, the safety rules, and the exact percentages master formulators use — so you’re not just following a recipe, you understand why it works. Whether you’re mixing your first batch or troubleshooting a bar that came out wrong, this is your reference hub.
📋 Table of Contents
- Why Beginner Batches Fail
- Quick Reference: Key Specs
- How Saponification Actually Works
- The Oils That Actually Matter
- Lye Safety: Non-Negotiable Rules
- Cold Process vs. Hot Process
- Starter Formula Spotlights
- 5 Big Myths About Soap Making — Debunked
- Step-by-Step Tutorial
- Troubleshooting & Common Mistakes
- Frequently Asked Questions
- Related Soap Making Guides & Tools
- The Final Verdict
Why Beginner Batches Fail
Before troubleshooting any single batch, it helps to know the handful of root causes behind nearly every failed bar of soap:
Inaccurate Measuring
Kitchen scales accurate to whole grams (not 0.1g) introduce enough error to throw off your entire lye ratio, especially in small batches.
Temperature Mismatch
Combining oils and lye solution at mismatched temperatures causes false trace, separation, and uneven saponification.
Copying Recipes Blindly
Substituting one oil for another without recalculating lye amounts (different SAP values) is the single most common formulation error.
Rushing Trace
Adding fragrance or color too early or too late causes seizing, streaking, or uneven scent distribution.
Skipping Cure Time
Judging a bar’s hardness or mildness before the full 4–6 week cure leads to false conclusions about a “failed” recipe.
Improvised Safety Gear
Skipping goggles or gloves “just this once” is how minor lye splashes turn into serious chemical burns.
Quick Reference: Key Specs
| Metric | Standard Range |
|---|---|
| Lye Concentration | 28–33% (water:lye ratio ~2:1 to 2.5:1) |
| Oils & Lye Temperature | 90–100°F (32–38°C) each before combining |
| Trace Time | 2–10 minutes depending on oil blend |
| Saponification (Full Chemical Cure) | 90–95% complete within 48 hours |
| Full Cure for Use | 4–6 weeks |
| Superfat / Lye Discount | 5–8% for standard bars |
| Mandatory PPE | Goggles, chemical-resistant gloves, long sleeves |
| Core Equipment | Digital scale (0.1g), stick blender, silicone mold, IR thermometer |
How Saponification Actually Works
Saponification is the chemical reaction where sodium hydroxide (lye) breaks fatty acid chains in oils apart and reforms them into soap molecules and glycerin. Every oil has a fixed SAP value (saponification value) — the exact amount of lye needed to convert one gram of that oil into soap. This is why recipes aren’t interchangeable without recalculation.
🔵 Full Saponification (0% Superfat)
- Every molecule of oil is converted to soap
- Maximizes cleansing power
- Higher risk of a lye-heavy, harsh bar if miscalculated
- Rarely used for skin bars — mainly for utility/laundry soap
💜 Superfatted (5–8%)
- Small percentage of oil remains unreacted
- Leaves the bar conditioning and gentle on skin
- Standard for facial and body bars
- Too high (10%+) risks a soft, greasy bar prone to rancidity
The Oils That Actually Matter
Once you understand what each oil contributes, you can build or adapt any recipe with confidence. Here’s the formulator’s cheat sheet:
Coconut Oil
High SAP value. Produces hardness and big, bubbly lather. Drying above 30% of total oils if not balanced with a higher superfat.
Palm Oil
Semi-solid fat that adds structure and a stable, creamy lather. Look for RSPO-certified sustainable sourcing.
Olive Oil
Rich in conditioning oleic acid. Slows trace and softens bars — often used at 20–40% for a mild, moisturizing formula.
Castor Oil
Used at 5–10%. Boosts lather stability and creaminess without significantly softening the bar.
Shea / Cocoa Butter
Adds hardness and skin-conditioning fatty acids. Common at 5–15% in luxury formulations.
Sweet Almond / Sunflower Oil
Lighter conditioning oils used at 10–20% to round out a recipe without the drag olive oil brings to trace time.
Lye Safety: Non-Negotiable Rules
Sodium hydroxide is a caustic material that causes severe chemical burns and releases irritating fumes on contact with water. These rules apply to every single batch, no exceptions:
Lye Into Water, Never Reversed
Adding water to lye causes a volcanic, superheated reaction that can erupt from the container.
Ventilate the Workspace
Mix outdoors or in a well-ventilated area — fumes peak in the first 30–60 seconds after mixing.
Full PPE, Every Batch
Goggles (not glasses), chemical-resistant gloves, and long sleeves — no exceptions for “just a small one.”
Dedicated, Labeled Equipment
Keep a lye-only pitcher, clearly labeled, stored well out of reach of children and pets.
Vinegar on Standby
White vinegar slows a minor lye splash while you flush the area thoroughly with water — it doesn’t replace flushing.
No Aluminum Contact
Lye reacts with aluminum to release hydrogen gas — a real fire and explosion risk.
Cold Process vs. Hot Process: The Real Comparison
Both methods use the same saponification chemistry — the difference is how heat is applied and how long you wait to use the bar.
🔵 Cold Process
- ✅ Smooth, glossy finish ideal for intricate designs
- ✅ More control over trace and swirl techniques
- ✅ Wider fragrance compatibility (less heat to accelerate)
- ⚠️ Requires a full 4–6 week cure before use
- ⚠️ Saponification finishes gradually, off the heat
💜 Hot Process
- ✅ Usable within days — saponification completes on heat
- ✅ Better for heat-stable additives like herbs and clays
- ⚠️ Rustic, textured finish — harder to achieve smooth swirls
- ⚠️ Thicker batter is harder to work with for beginners
- ⚠️ Higher risk of scorching if heat isn’t monitored closely
| Category | Cold Process | Hot Process | Winner |
|---|---|---|---|
| Beginner-friendliness | Easier to control trace | Steeper learning curve | Cold Process |
| Time to first use | 4–6 weeks | 1–2 days | Hot Process |
| Design/swirl potential | Excellent | Limited | Cold Process |
| Heat-sensitive additive safety | Higher risk of fading | Additives survive better post-cook | Hot Process |
Starter Formula Spotlights
Classic Coconut-Olive Bar
30% coconut oil, 30% olive oil, 20% palm oil, 15% sweet almond oil, 5% castor oil, at 5% superfat. Balanced hardness, lather, and conditioning — the standard beginner starting point.
✅ Best First RecipeHard Cleansing Bar (No Olive Oil)
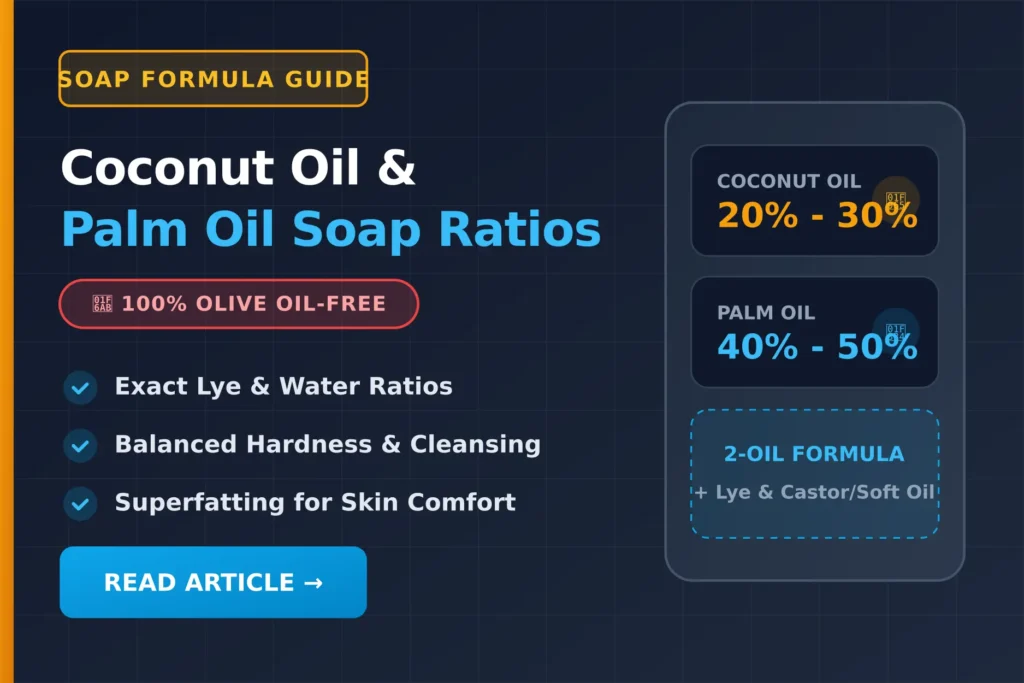
65% coconut oil, 35% palm oil, at 8% superfat, with optional 5–10% castor oil. Very hard, long-lasting, high-lather bar — requires a higher superfat to offset coconut oil’s cleansing intensity.
✅ Best for Humid ClimatesLuxury Conditioning Bar
25% coconut oil, 35% olive oil, 15% shea butter, 15% sweet almond oil, 10% castor oil, at 6% superfat. Softer, slower-tracing recipe built for skin feel over shelf life.
✅ Best for Sensitive Skin5 Big Myths About Soap Making — Debunked
Step-by-Step Cold Process Tutorial
Prep Workspace & PPE
Cover surfaces, gather tools, and put on goggles and gloves before touching lye.
Weigh Oils & Lye Separately
Use a digital scale accurate to 0.1g/0.01oz — this is the single biggest source of formulation error.
Mix Lye Into Water
Never the reverse. Stir gently until dissolved; expect a spike to 180–200°F (82–93°C).
Cool to 90–100°F (32–38°C)
Use an infrared thermometer on both the lye solution and oils; a 10–15°F gap is acceptable.
Combine & Blend to Light Trace
Pulse with a stick blender, alternating with hand-stirring, until batter leaves a faint trail when drizzled.
Add Fragrance & Color
Blend in briefly at light trace, then pour into your mold and tap out air bubbles.
Insulate & Unmold
Insulate 24–48 hours to support gel phase, then unmold and cut once firm enough to hold a clean edge.
Cure 4–6 Weeks
Rest bars on a rack with airflow, flipping weekly, before use or sale.
Troubleshooting & Common Mistakes to Avoid
Soap Seizing
Usually caused by fragrance oils reacting too fast. Test new scents in small batches and add fragrance at the last possible moment before pouring.
False Trace / Separation
Caused by mismatched oil and lye temperatures. Confirm both are within 10–15°F of each other before combining.
Soda Ash
A cosmetic white coating from unreacted lye meeting air. Spritz the top with 91% isopropyl alcohol right after pouring.
Cracking / Overheating
Happens when insulation traps too much heat, especially with sugar additives. Uncover the mold immediately and reduce insulation next time.
Frequently Asked Questions
How long does cold process soap need to cure before it’s safe to use?
It’s chemically safe after 48 hours once saponification completes, but a full 4–6 week cure produces a harder, milder, longer-lasting bar.
What is the correct lye-to-water ratio for beginners?
Most beginner formulas use a 28–33% lye concentration — roughly 2 to 2.5 parts water per 1 part lye by weight.
Can I substitute oils without recalculating lye amounts?
No. Every oil has a different SAP value, so any substitution must be run through a lye calculator to avoid a lye-heavy or overly soft bar.
Why did my soap turn out soft and greasy?
This usually points to a superfat percentage that’s too high or an oil blend too heavy in soft conditioning oils. Rebalance toward hardening oils and extend cure time to 6 weeks.
Related Soap Making Guides & Tools
Use these free tools alongside this guide to plan and check your next batch.
The Final Verdict
Cold process soap making rewards precision, not intuition. A properly calculated oil-to-lye ratio, strict lye safety habits, and a full cure time will produce a consistently hard, gentle, long-lasting bar — regardless of how simple or elaborate your oil blend is.
The bars that fail almost always trace back to skipped measuring accuracy, mismatched temperatures, or impatience with cure time — not bad luck. Get those three fundamentals right, and every formula in this guide becomes a reliable starting point for your own recipes.